
Monitor groups organize your monitors into labeled sets by project, environment, client or team. A monitor can belong to several groups at once. Groups scope the dashboard, pick the monitors for a maintenance window or a scheduled report, and limit what a team member with restricted access can see anywhere in the account. Groups live at Configuration → Groups. To restrict a team member to specific groups, follow Limiting a Member to Monitor Groups.
Before You Start
- Creating, renaming, recoloring and deleting groups requires the Owner, Admin or Editor role. A Read-only member sees group labels and filters but never reaches the Groups page.
- A member whose access is already limited to specific groups cannot create new ones. See User Roles and Permissions.
What a Group Does
A group is a label on a set of monitors. One monitor can sit in Production, Web Team and Client: Acme at the same time, and nothing caps how many groups it joins.
| Where it applies | Effect of group membership |
|---|---|
| Access control | An Editor or Read-only member can be limited to named groups. They see only monitors in those groups, everywhere: lists, detail pages, logs, incidents, the dashboard, search and exports |
| Maintenance windows | A window in By group mode suppresses checks and alerts for whatever is in the group at the time it runs. It follows group changes |
| Scheduled reports | The report editor's Add group shortcut copies the group's current members into the report's monitor selection as individual picks |
Changing group membership changes who can see a monitor and what is muted during maintenance. Treat a group edit with the care you would give an alert rule.
Creating and Managing Groups on the Groups Page
Go to Configuration → Groups. The page lists every group on the account in creation order, with its color swatch, its name and its monitor count.
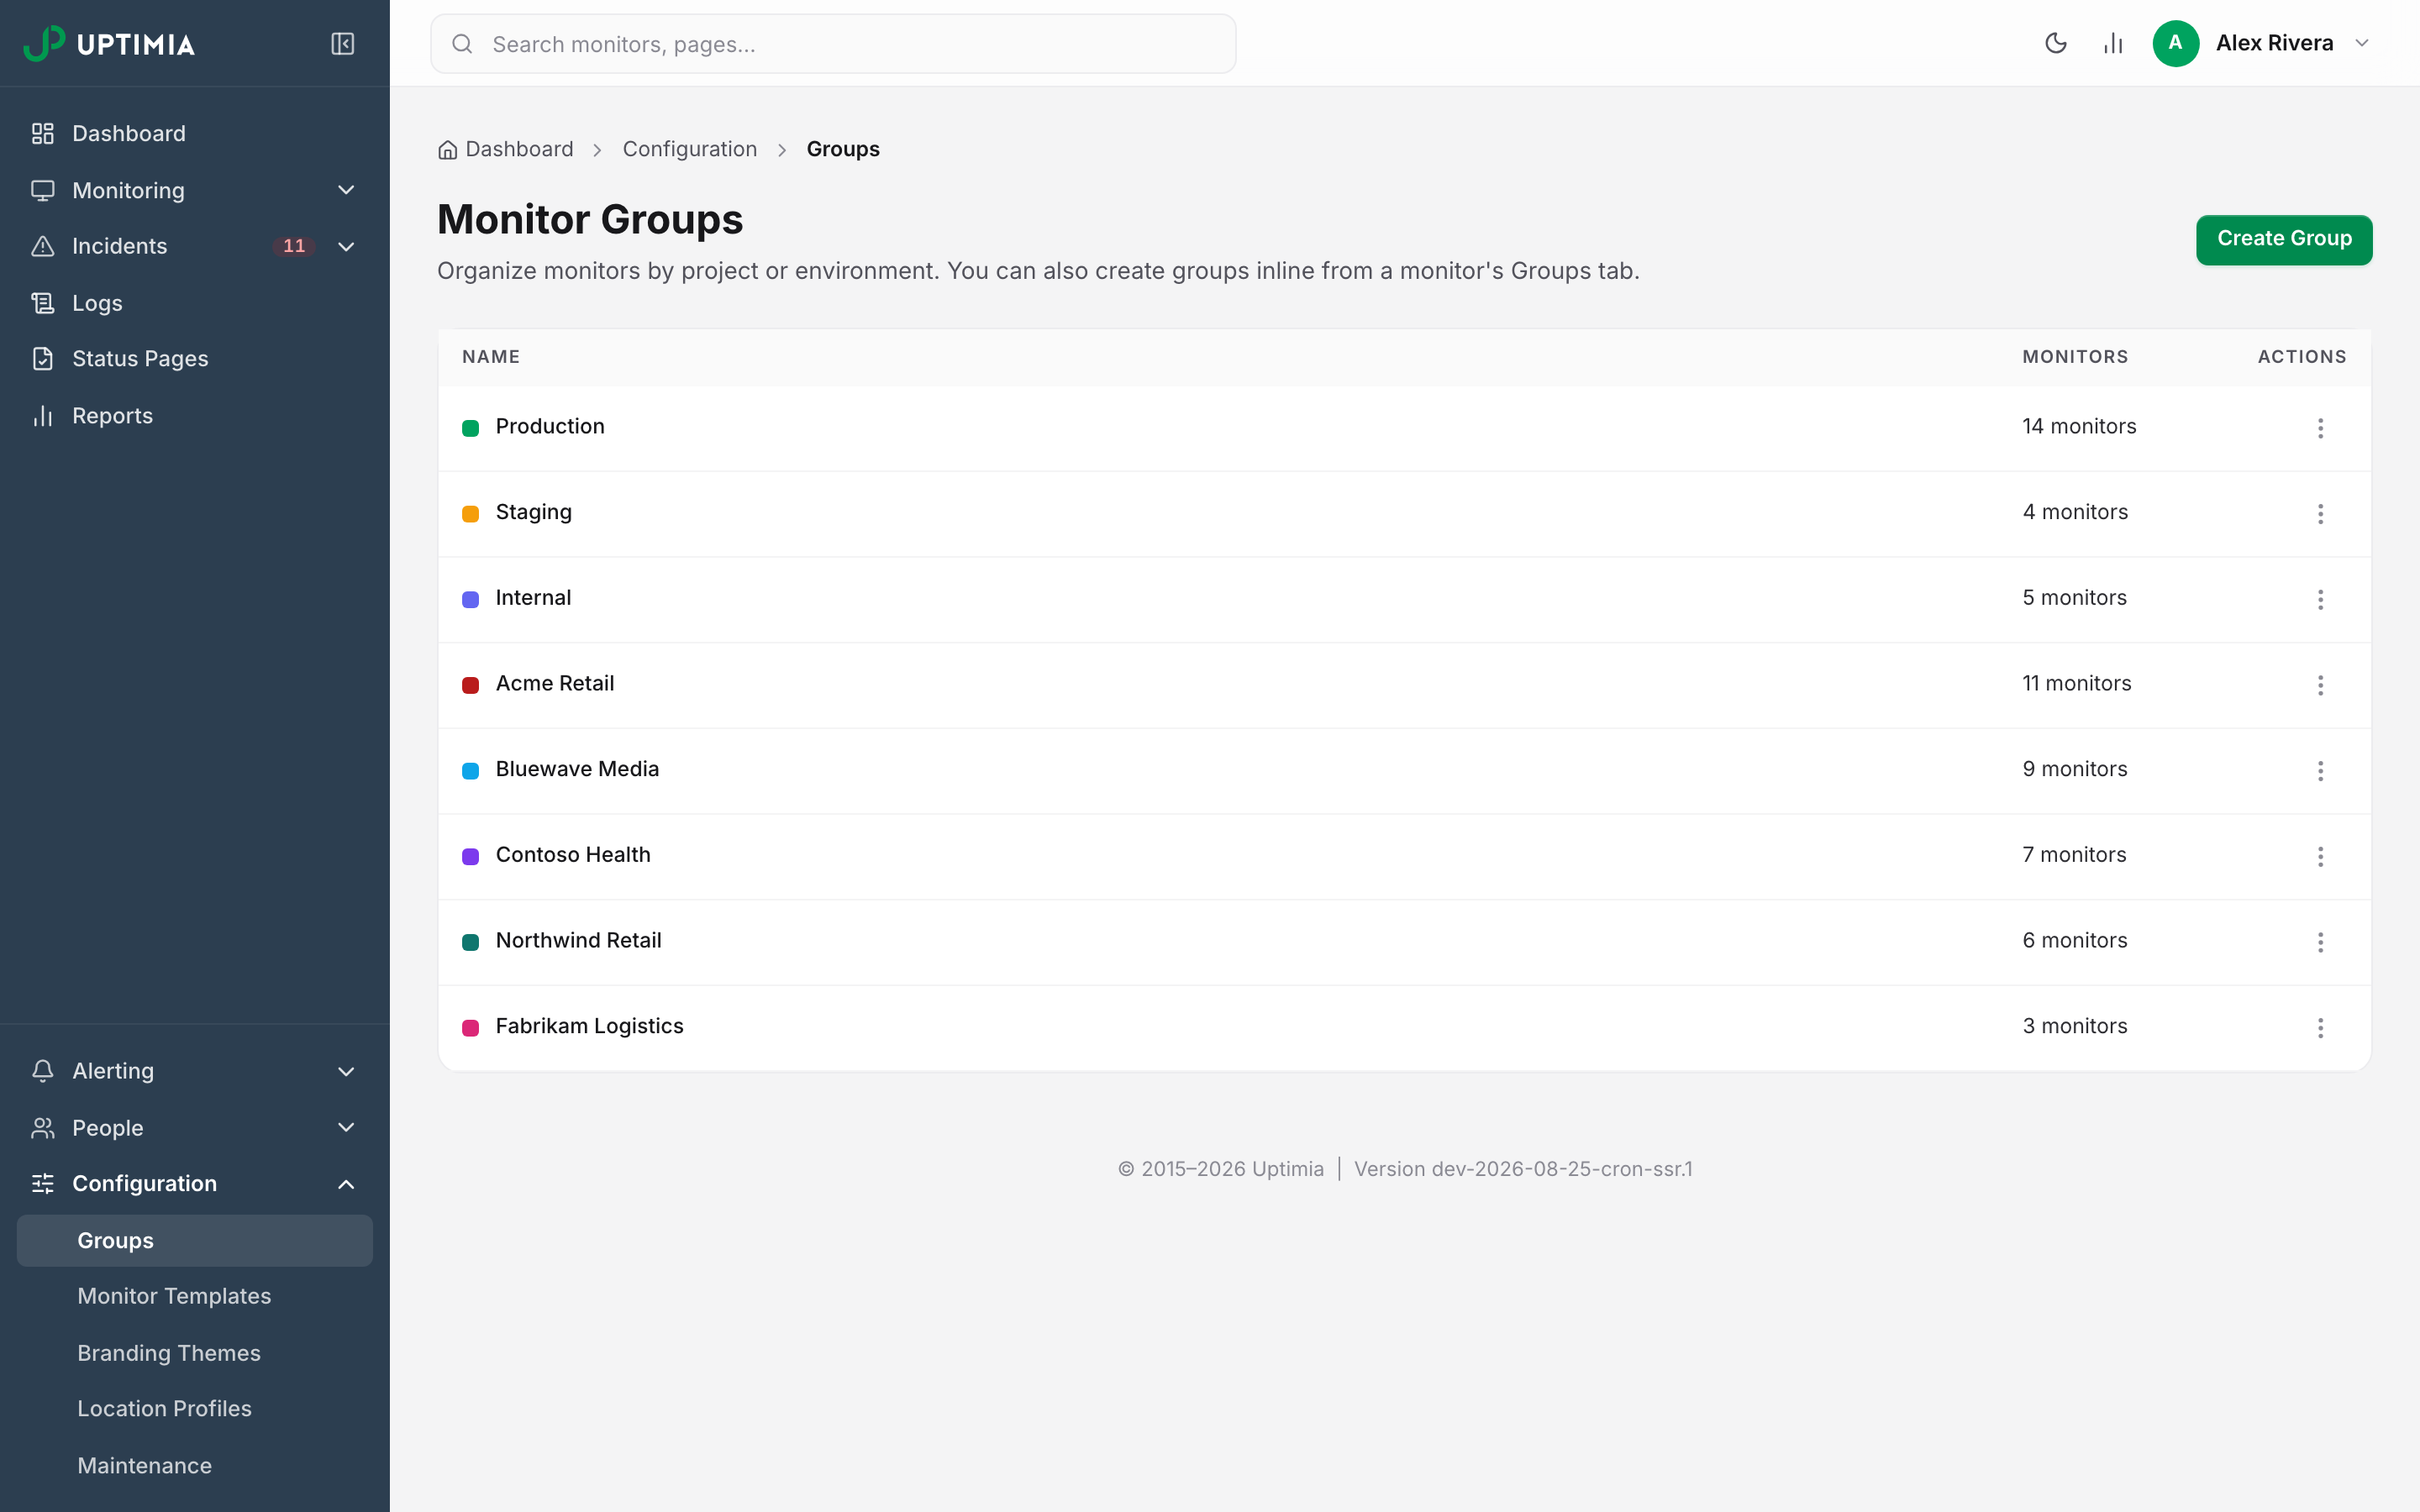
- Click Create Group.
- Enter a Group Name. It cannot be empty, and it is capped at 100 characters. The limit is measured in bytes, so accented or non-Latin letters use more than one each.
- Pick a Color. The swatch opens your browser's color picker, and the field beside it accepts a typed hex code in
#RRGGBBform. The default is#00a35f. - Click Create Group to save.
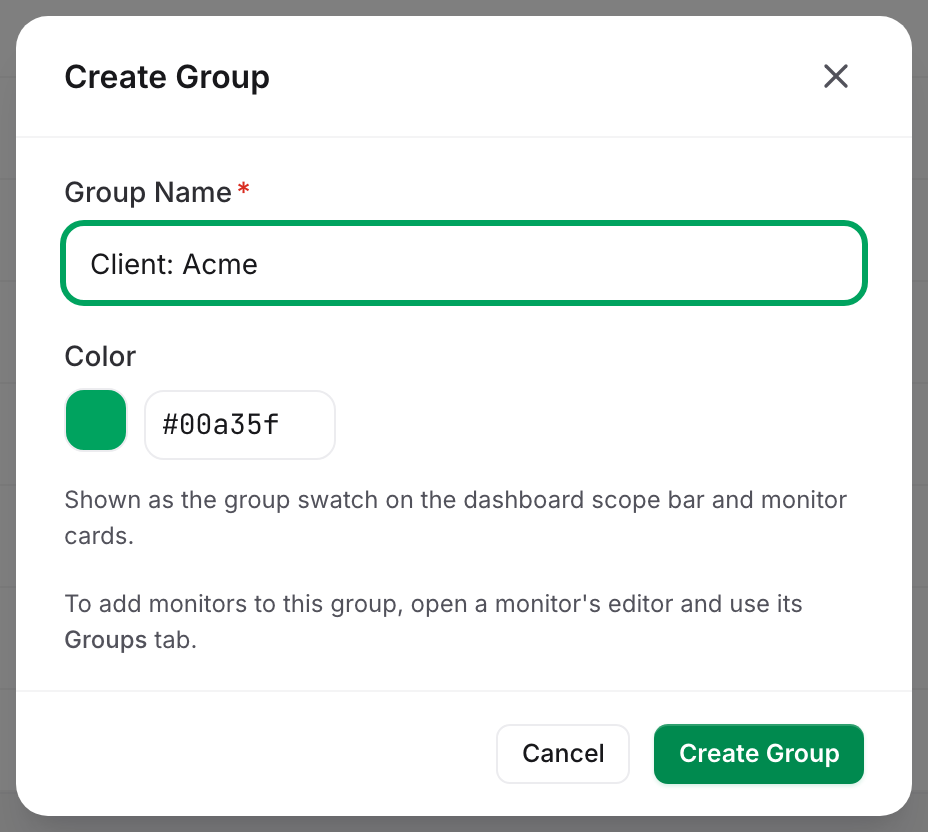
To change a group, click its row (or use the row menu → Edit), adjust the name or color, then click Save Changes. Deleting is in the same row menu. Deleting a group ends any maintenance coverage it provided, so read Renaming, Recoloring and Deleting first.
Until the account has its first group, an interactive explainer replaces the table. It covers three steps: create the group, tick it on a monitor's Groups tab, then pick it on the dashboard scope bar.
The Groups page never assigns monitors. You set membership in the monitor editor, as the create modal says.
Creating a Group From a Monitor
The monitor editor's Groups tab is the second way to create a group.
- Open a monitor's editor and switch to the Groups tab.
- Click Create new group.
- Pick one of the 20 preset colors, type the group name, and click Create.
Uptimia creates the group at once and ticks the monitor you are editing into it, so the group then appears in the Groups tab of every other monitor on the account. Colors here come from the preset palette. For an arbitrary hex value, use the Groups page.
Assigning Monitors to Groups
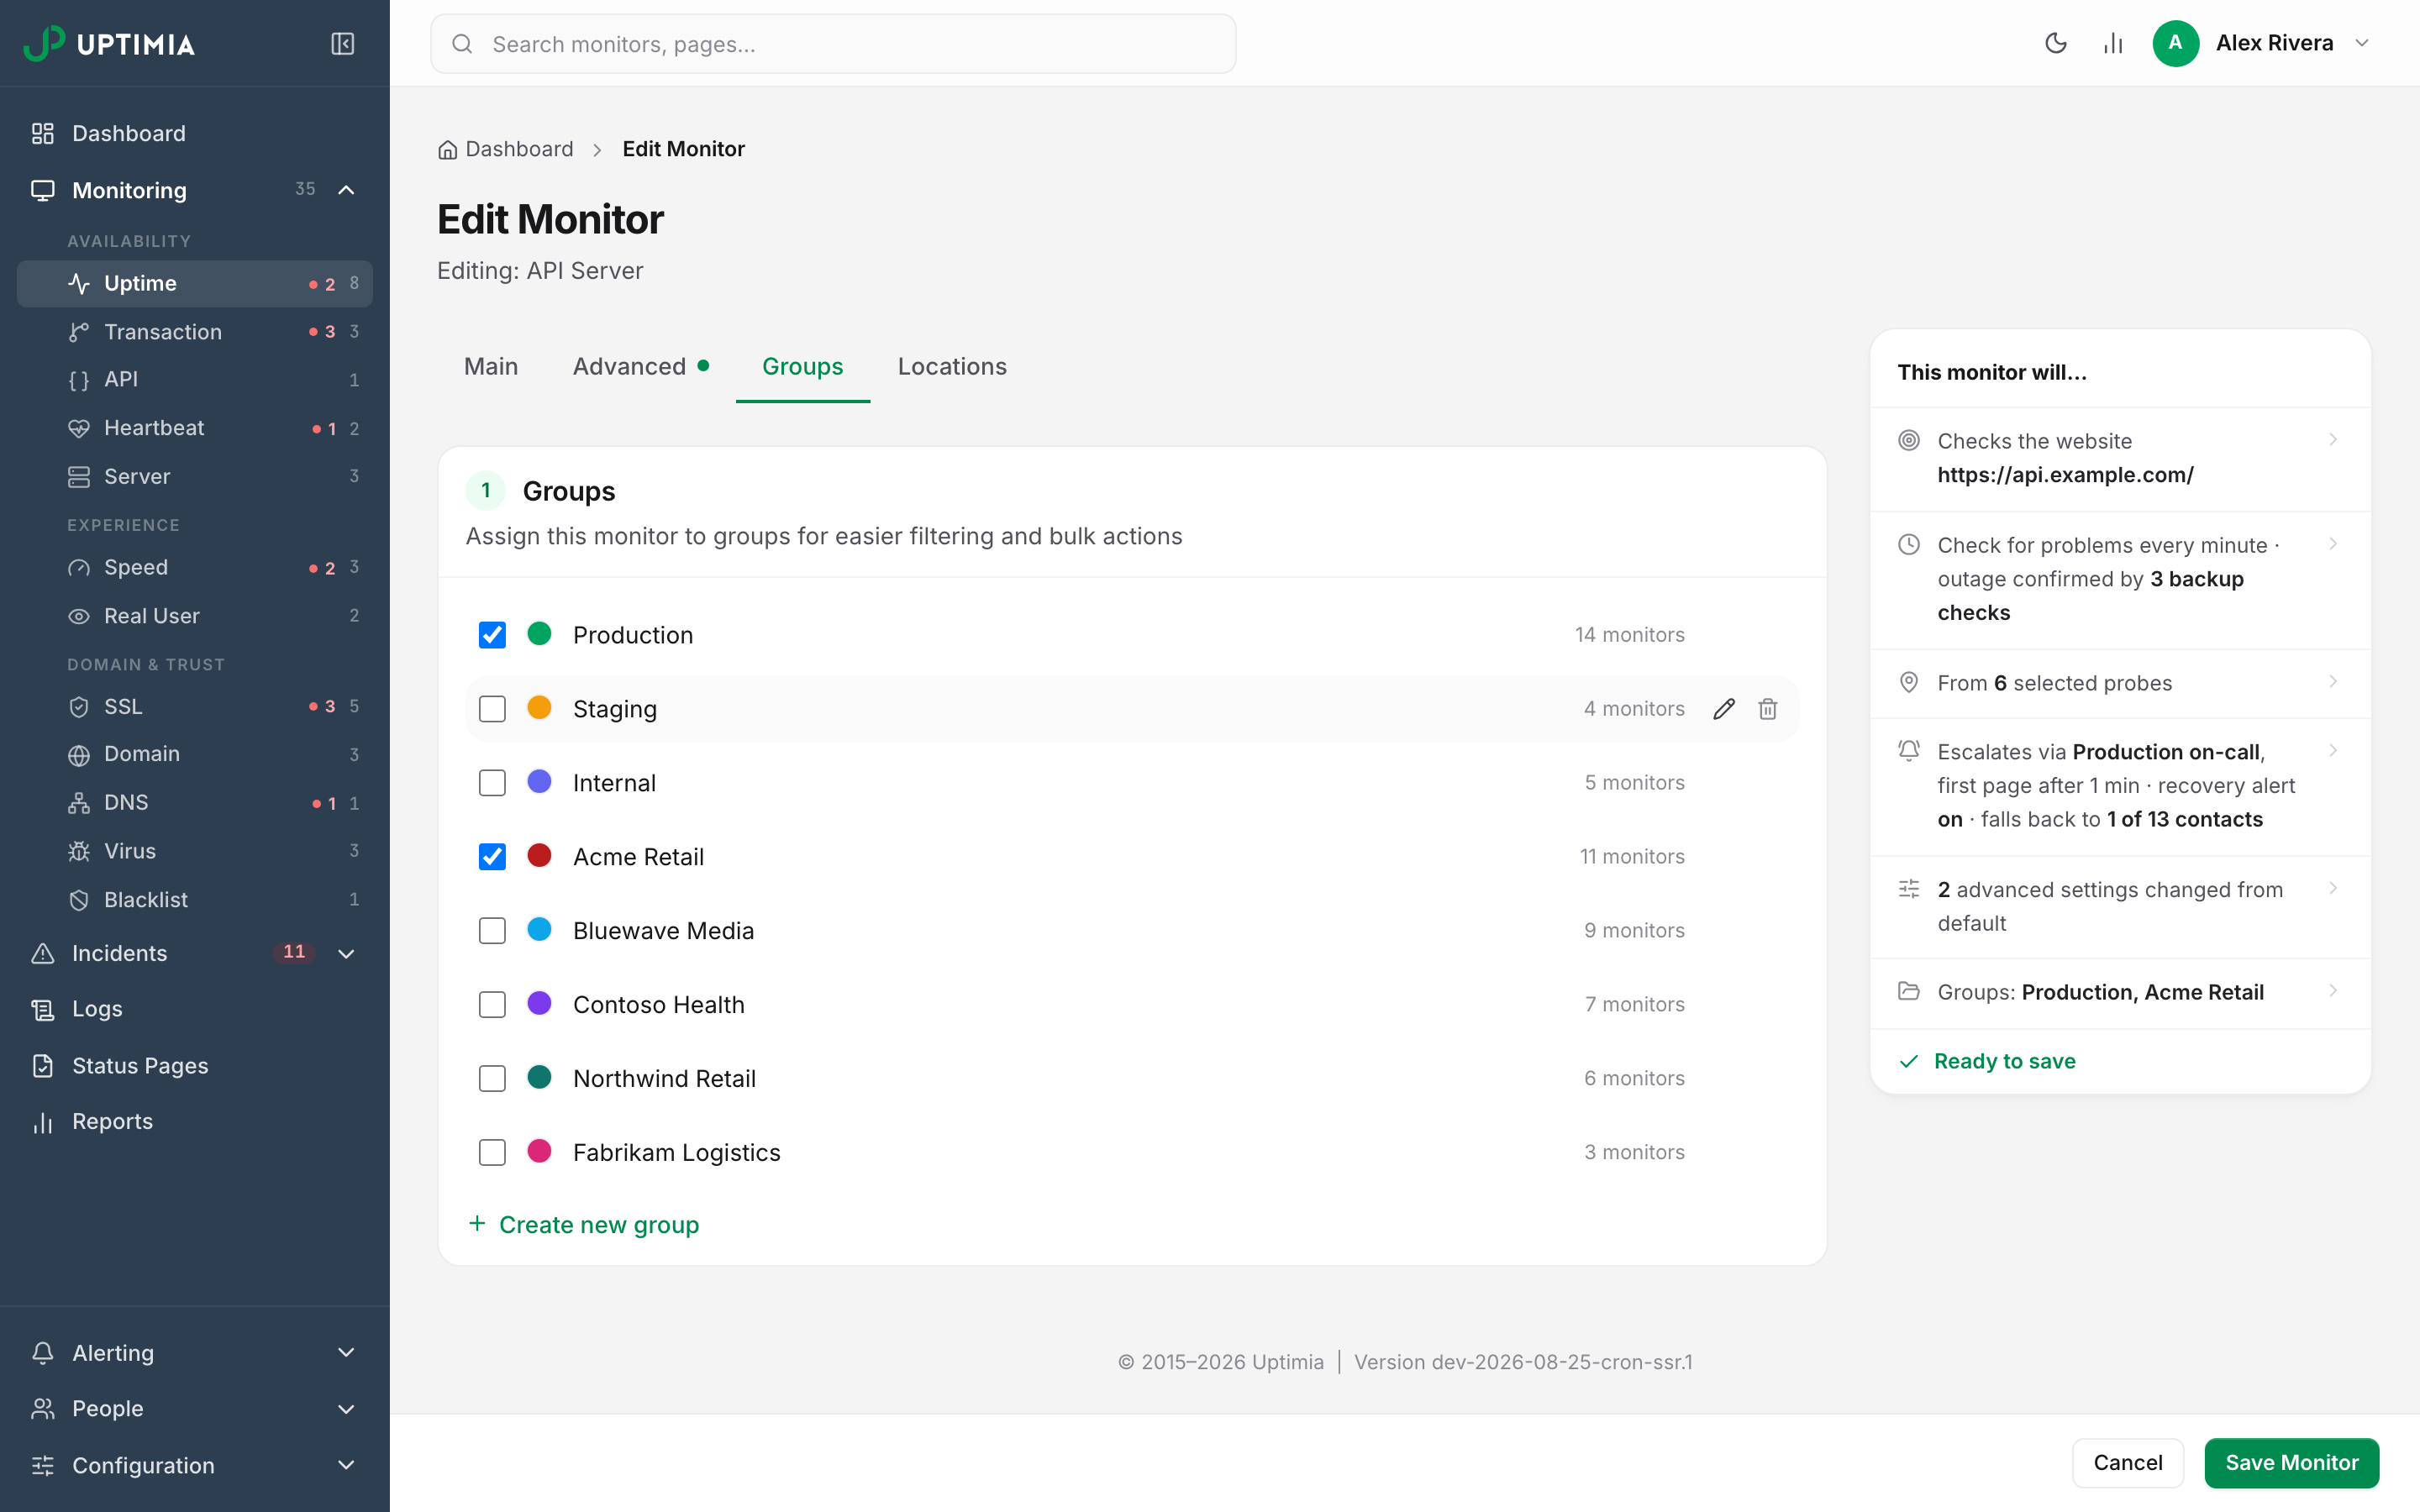
Every group appears in any monitor's Groups tab as a checkbox row with its color dot, its name and its monitor count. Tick the groups the monitor belongs to and untick the ones it should leave. Then save the monitor. Whatever you leave ticked when you save becomes the monitor's complete membership, so unticking every row leaves the monitor in no group at all, and a monitor in no group is invisible to a team member limited to groups.
You rename and recolor a group from the same tab. Hover a row and click the pencil to rename inline, or click the color dot to open the 20-swatch palette. Those edits apply to the group itself and take effect for every monitor in it, saved or not.
Creating monitors in bulk applies one shared group list to the whole batch. See Bulk Operations.
Filtering the Dashboard by Group
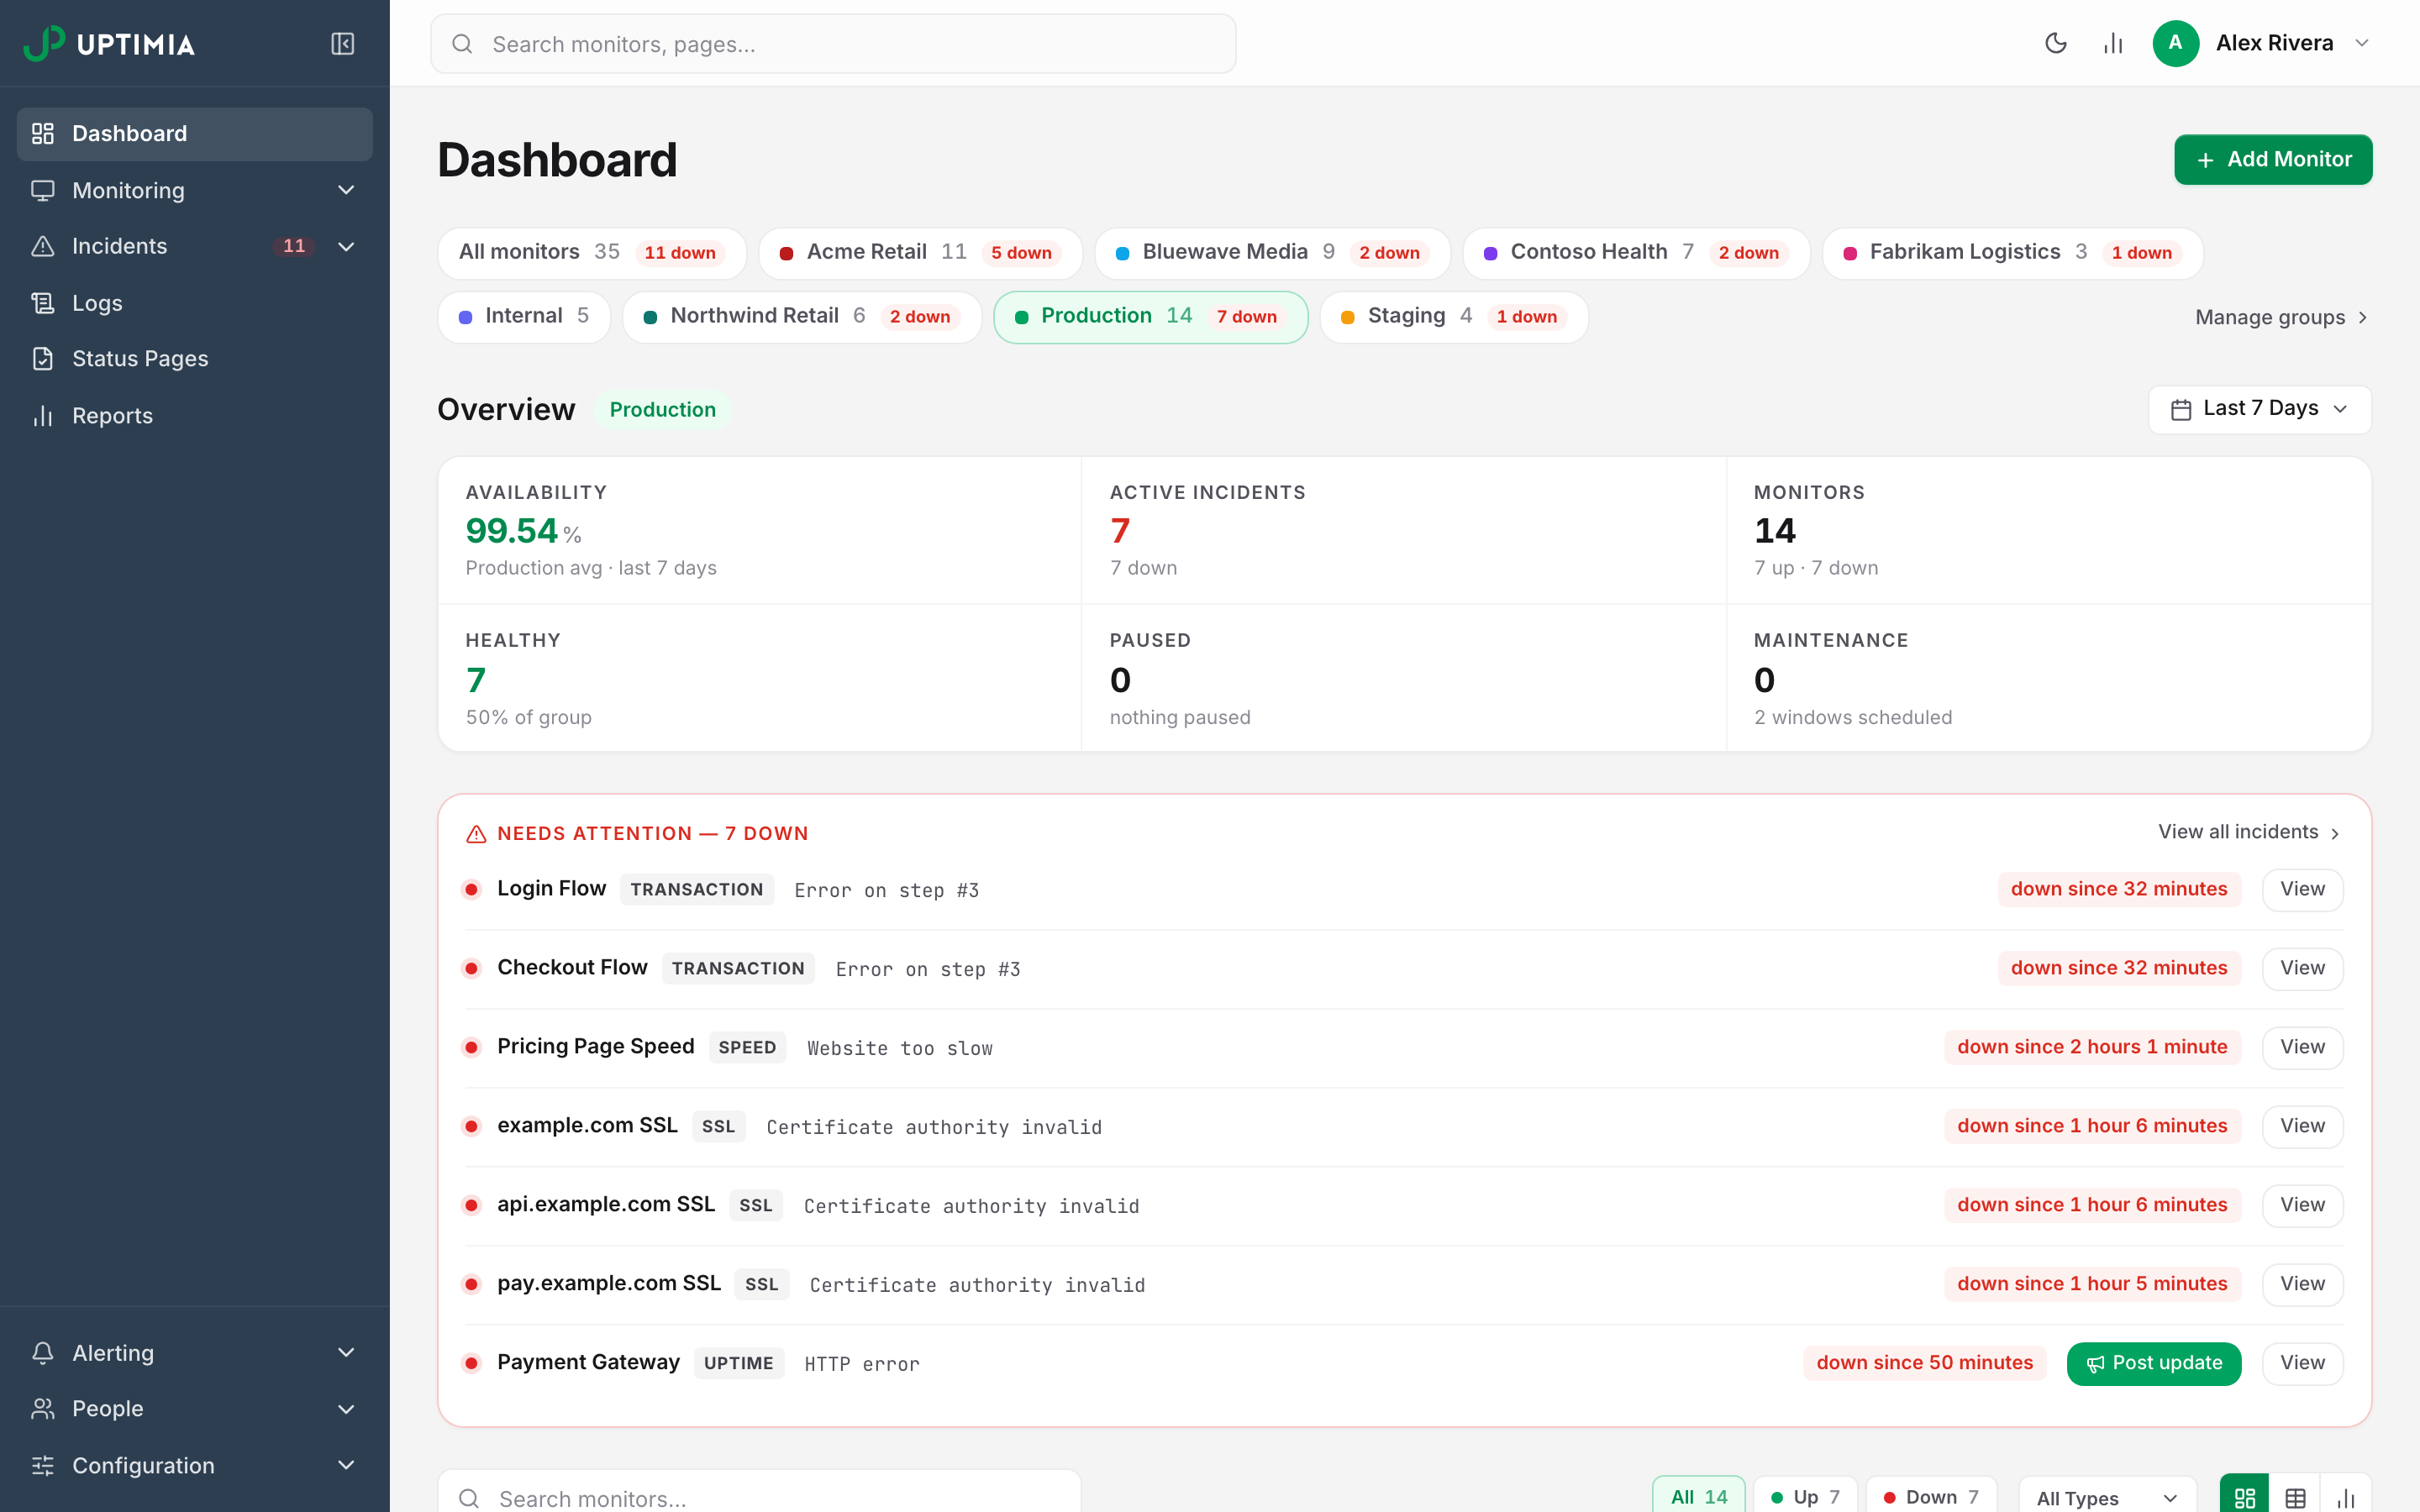
The dashboard carries a scope bar above the summary cards, with an All monitors tab plus one tab for every group that currently holds at least one monitor. A group holding no monitors gets no tab. Each tab shows the group's color swatch, its monitor count, and a red n down badge when something in it is down.
Selecting a group scopes the whole dashboard, the summary cards as well as the monitor list, so the availability and incident numbers then describe that group alone. Uptimia keeps the selection in the page address, so you can bookmark a scoped view or paste it into a chat. Clicking the active tab clears the scope and returns you to the full fleet.
Manage groups, at the right end of the bar, opens the Groups page. An account with no groups, or one whose groups hold no monitors yet, gets no scope bar at all.
A group's color also appears as a small swatch beside the monitor name on each dashboard monitor card, hover-labeled with the monitor's groups.
Groups in Maintenance Windows
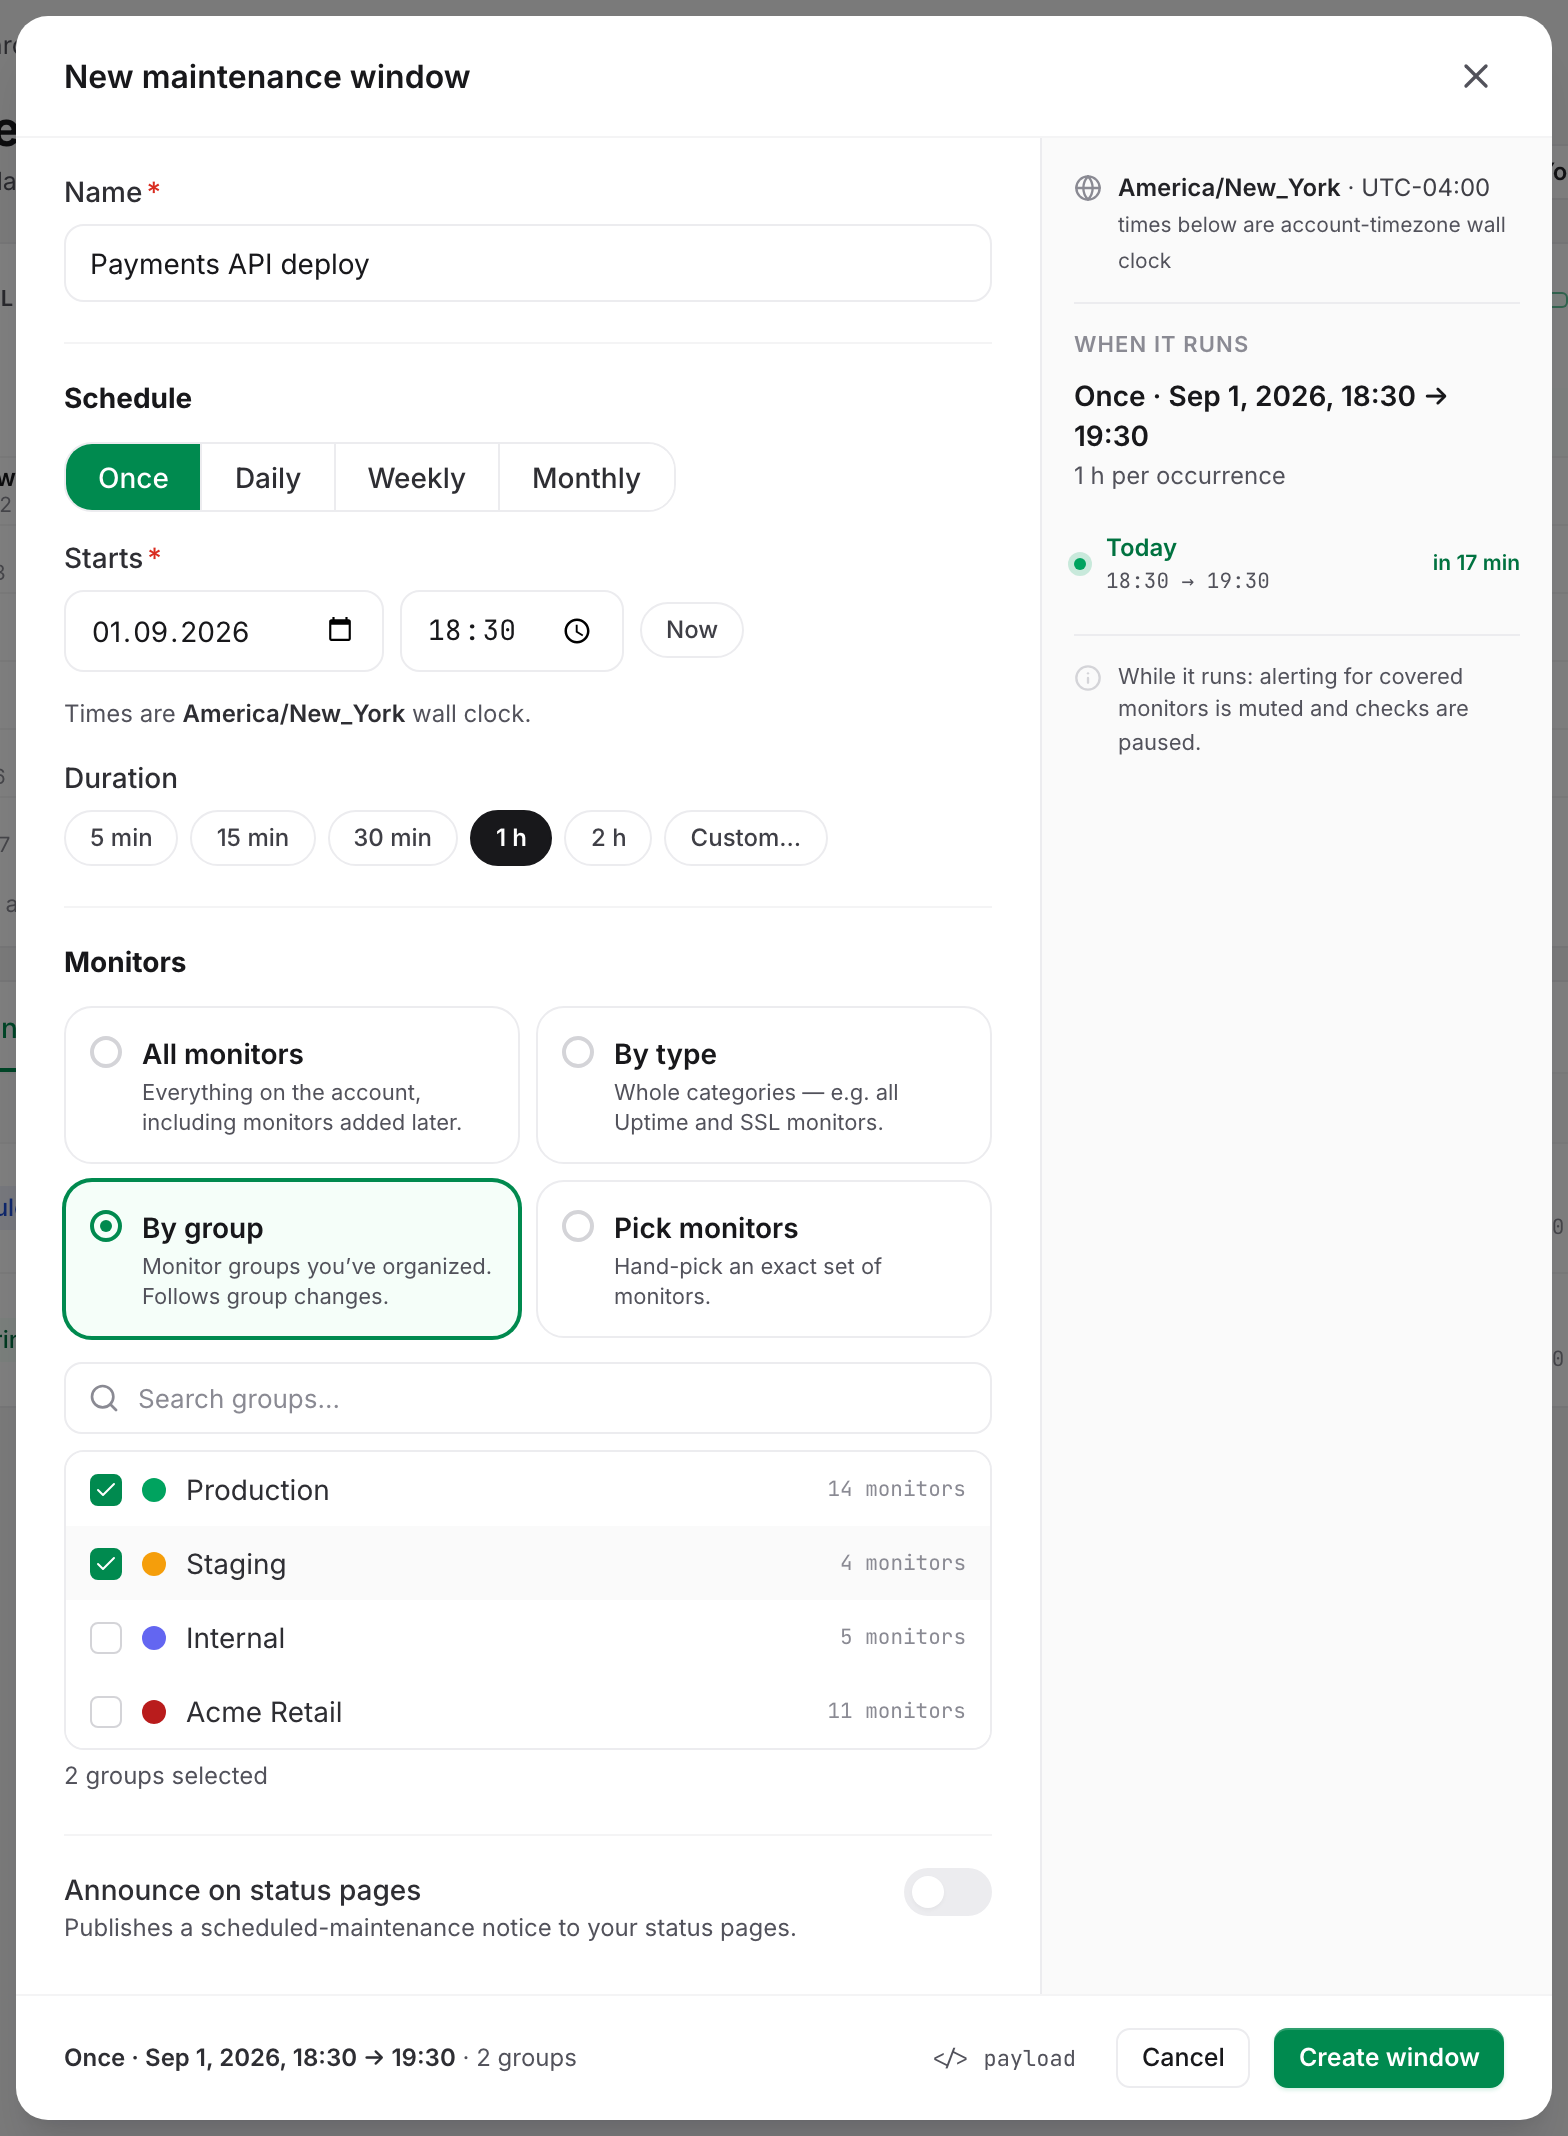
When you schedule a maintenance window, the scope section offers four selection modes: All monitors, By type, By group and Pick monitors. The editor describes By group as "Monitor groups you've organized. Follows group changes". The description is literal: the window covers whatever is in the group when each occurrence runs, so a monitor added later is covered without editing the window.
Groups as an Access Boundary
An Editor or Read-only member can be limited to named groups. The limit covers every page, log and export that member can open, and Uptimia refuses any save that names a monitor outside their groups.
- A monitor that belongs to no group is invisible to a limited member.
- Uptimia filters a limited member's group list too. They see only their own groups, and the counts beside those groups count only what they can reach.
- A limited member cannot create a group. Uptimia answers "Your access is limited to specific monitor groups, so you can't create new groups. Ask the account owner or an Admin." Renaming or deleting a group outside their access reports the group as not found, the same answer they get for a group that was never created.
- Owner, Admin and Accounting / Billing seats are never limited.
The full procedure is in Limiting a Member to Monitor Groups.
Renaming, Recoloring and Deleting
Renaming and recoloring take effect everywhere at once. The scope bar, the monitor cards, the editor's Groups tab and the maintenance picker all read the same list.
Deleting removes the group and its monitor associations, drops the group from any By group maintenance window, and leaves the monitors themselves in place. They keep running and lose only the label.
Warning: deleting a group ends the maintenance coverage that group provided. Any monitor that was in maintenance only because of that group leaves maintenance at once and resumes checks and alerts for the rest of the occurrence. If a window is running, end or re-scope it before you delete the group.
Deleting a group can also hide monitors from a scoped team member: a monitor left in no group at all is invisible to them. Check what the group holds before you remove it.
Every action on this page is also available from a script. See Getting Started with the Uptimia API.